Scenario: You want to use Hyper-V Manager from a domain-joined Windows 10 Professional client computer to connect to a Windows Hyper-V Server 2016 which is a Workgroup computer (i.e. not domain-joined).
I struggled for a couple of hours with this configuration, and read plenty of googled blog posts about how to do it. I wrote this post to document, the exact steps I finally followed to get this working as simply as possible.
(This post deals strictly with Windows Hyper-V Server 2016 and Windows 10 Professional, so do not assume these same steps work on Hyper-V Server 2012 or any prior version of Windows client OS prior to Windows 10.)
Let’s start with the Server
I’ll assume you’ve installed Hyper-V Server 2016 (the free thing from Microsoft which can host Hyper-V virtual machines. This is a non-GUI install of the Windows Hyper-V Server OS, and while you can administer it from the terminal window on the server, most people will want to manage it remotely from a client machine using Hyper-V manager GUI tool from another client machine running Windows 10 Professional or perhaps a full Windows Server 2016 machine.
After installing, I left mine as a Workgroup computer because I did not want to join it to a domain, at least not just yet.
I’ll leave the basic setup from the blue sconfig.cmd screen up to you. I’m not going to walk you through all these baby steps in this post. The bottom line is that once you’ve enabled Remote Management and Remote Destkop, you can RDP from the client machine into the server (using the server IP address until you add fqdn in the your client hosts file later).
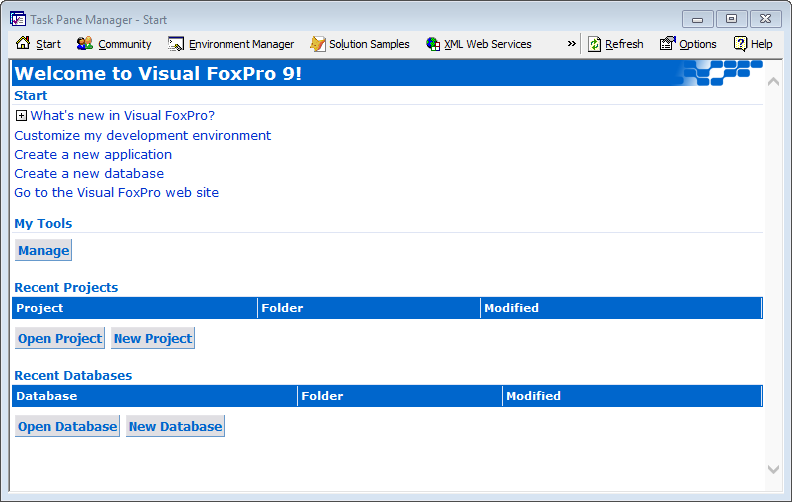
Your server “desktop” should look like this:
From Powershell window at Server:
1. Enable-PSRemoting
2. Enable-WSManCredSSP -Role server
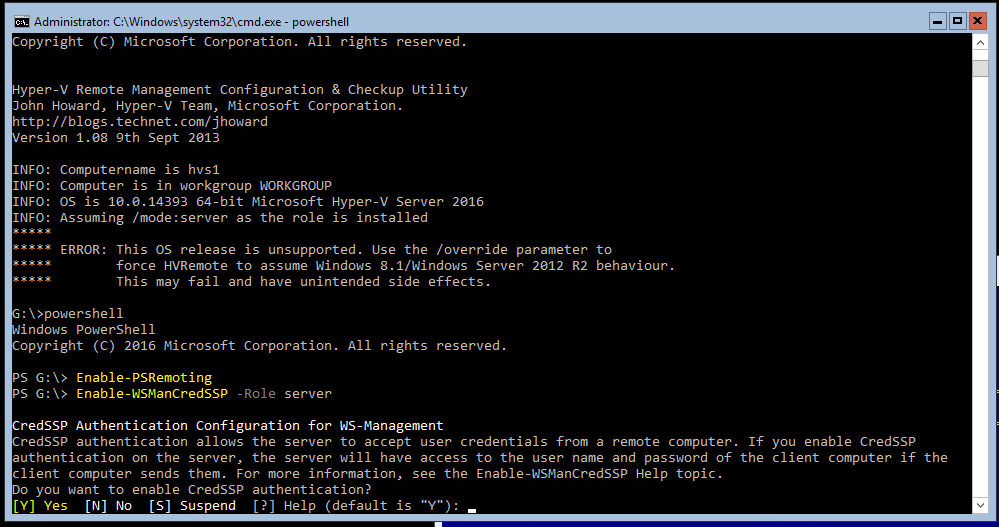
Next, still in PowerShell command window:
(From: https://www.ivobeerens.nl/2015/08/28/manage-hyper-v-in-a-workgroup-remotely/)
3. Set-NetFirewallRule -DisplayGroup 'Windows Management Instrumentation (WMI)' -Enabled true -PassThru
4. Set-NetFirewallRule -DisplayGroup 'Remote Event Log Management' -Enabled true -PassThru
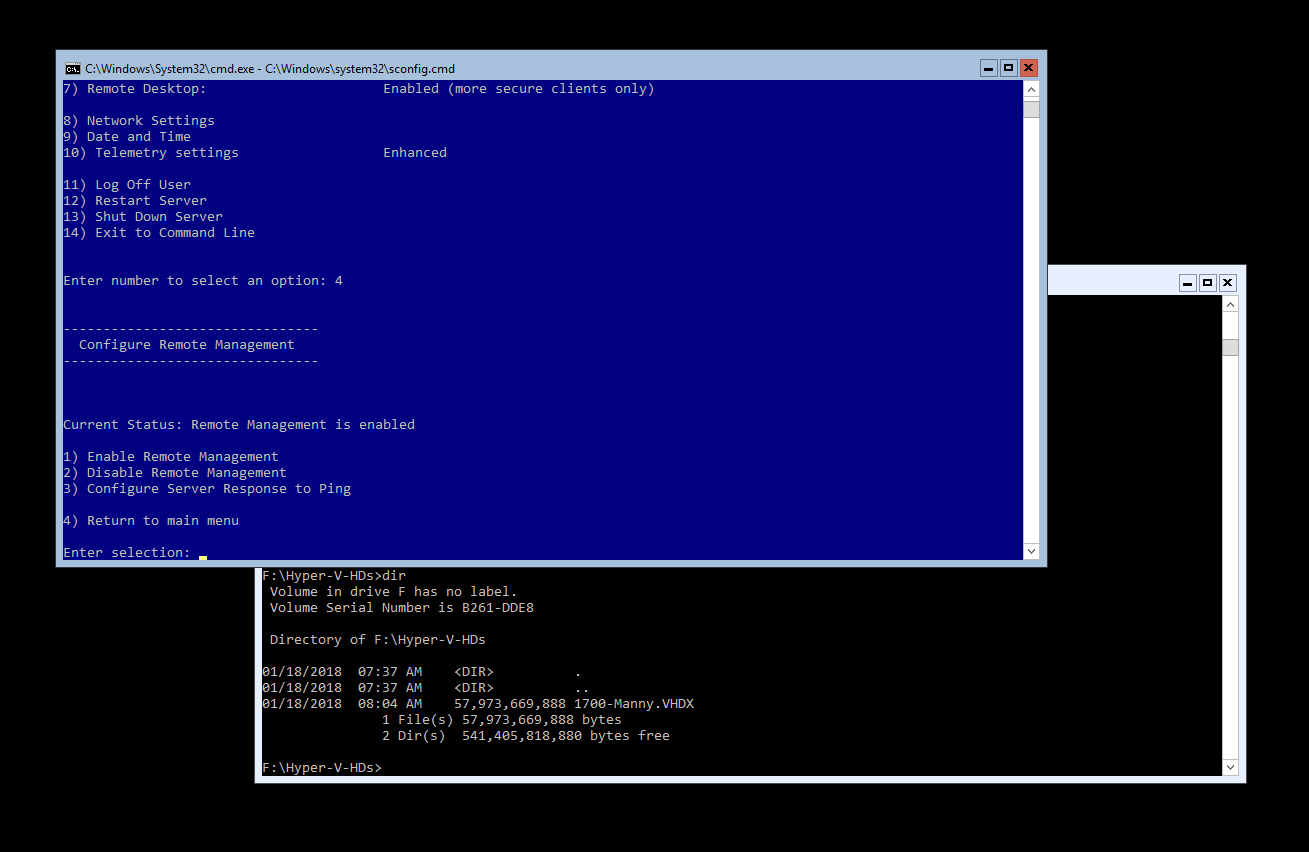
Finally, from the blue sconfig.cmd menu on the server:
5. Enable remote ping from clients to server:
From sconfig.cmd menu on Hyper-V Server 2016, select:
“4) Configure Remote Management” then
“3) Configure Server Reposonse to Ping” and select to enable this feature.
You should now be able to ping the server from any client machine on the next. Go to command window on a client machine and test Ping 192.168.0.55 (or whatever IP address you assign to your server.
Now setup the Client machine
(again, this assumes a Windows 10 Professional computer, domain joined)
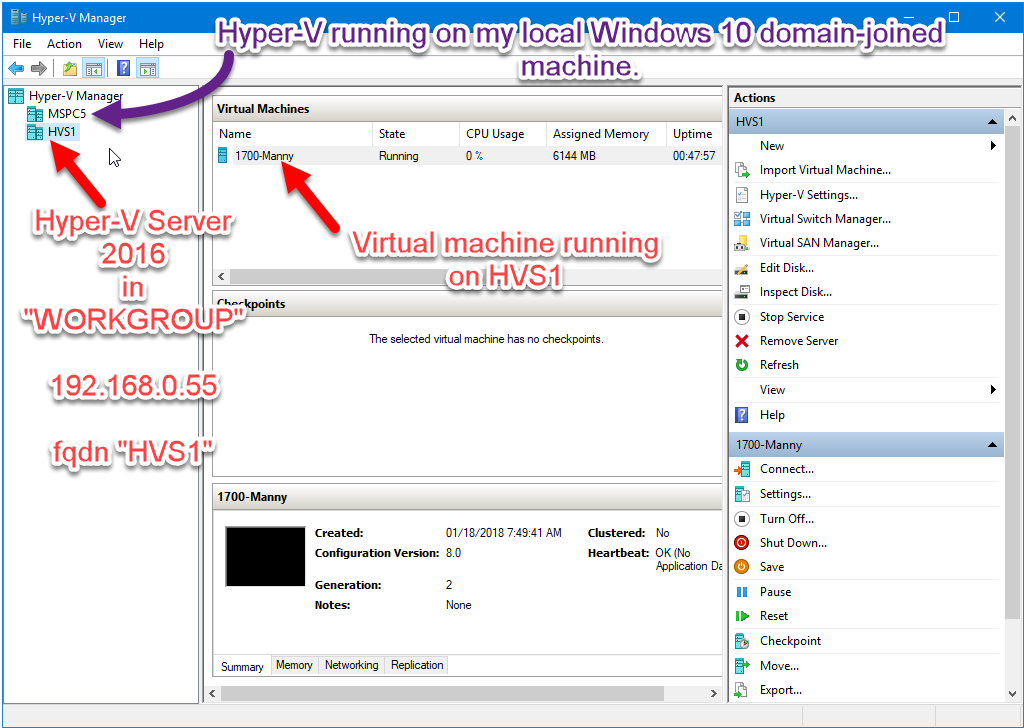
In my case, ServerName was “HVS1”, IP address of server was 192.168.0.55
1. Edit the “hosts” file in C:\Windows\System32\Drivers\etc\hosts, add this line at the bottom:
192.168.0.55 HVS1
The above two values represent the IP address of the server and fqdn ServerName of your server. Modify values per your sever details.
2. Enable-PSRemoting (From Powershell admin console)
3. Modify a Group Policy setting:
Run gpedit, then:
Administrative Templates >
System >
Credentials Delegation >
Find: “Allow delegating fresh credentials with NTLM-only server authentication”
Click Enabled, then, add an entry in the server list as follows (use the Show button to get a popup grid where you can enter this entry below):
add wsman/fqdn-of-hyper-v-host (i.e. wsman/HVS1) (Remember to enter “wsman/” before the computer name.)
4. Set-Item WSMan:\localhost\Client\TrustedHosts -Value "HVS1" (From Powershell admin console) Click YES when you get a security warning explaining what setting changes you are making.
5. Enable-WSManCredSSP -Role client -DelegateComputer "HVS1" (From Powershell admin console) Click YES when you get a security warning explaining what setting changes you are making.
Now connect to remote Hyper-V Server from your client machine using Hyper-V Manager
In the left pane, right-click Hyper-V Manager,
Click Connect to Server.
Select “Another Computer”
Enter HVS1 (i.e. the fqdn-of-hyper-v-host)
Check “Connect as another user” checkbox.
Enter username: HVS1\Administrator (Remember to put “ServerName\” before the username
Enter password: (the admin password on server)
Final step to moving a VM from a domain-connect Windows Server 2016 to a Workgroup-based Hyper-V Server 2016 machine.
So after getting all the above setup, I learned you cannot Live Migrate from a domain-connected Hyper-V to a Workgroup based Hyper-V Server. So, I thought I take the next easiest route and simply copy the .vhdx file to the new Hyper-V Server I created… But then after building a new VM in Hyper-V Manager and attempting to attach the .vhdx disk image, it will fuss as you and tell you that the VM Machine you are working with does not have access rights to open the .vhdx file that you copied over. After some googling, I found I was not the only one to ever have this problem, and several blogs posts outlined the fix… When creating the new VM, just tell it you will attach the .vhdx file later. This will get the VM created and Windows will give it a unique GUID Machine ID (you will need this GUID in the next step below). Next you go to an elevated command window (not Powershell) on the Hyper-V Server, and use the “icacls” command to grant permissions of the Hyper-V machine GUID to the .vhdx file. Follow this blog post:
To find the VM Machine ID, you can follow the simple instructions on this post: https://www.petri.com/get-hyper-v-virtual-machine-process-id-and-guid
So, here is the command I ran to get my copied-over VM working like a charm on the new Hyper-V Server machine:
|
1 |
icacls "F:\HYPER-V-HDS\SRVR2016-VM1.VHDX" /grant "NT VIRTUAL MACHINE\7728C29D-C68B-4889-A39E-0E8C78718275":(F) |
Using Computer Management on a client machine to remotely access the Hyper-V Server
You can run the Computer Management tool from a client machine to remotely access the Hyper-V Server with a graphical interface. If you want to use the Disk Management node in the Computer Management tool, you’ll need to enable some firewall rules on *both* the Hyper-V Server and the client machine. (Note: the “client machine” could be one of the Windows Server VMs you are probably running in Hyper-V Server).
Credit to this blog post for answering how to do this: https://social.technet.microsoft.com/Forums/office/en-US/cbdbcf92-d697-41d1-aa7a-bacf34bd48a5/remote-disk-management-rpc-server-unavailable
You can run these PowerShell scripts to enable the required firewall rules (remember, you have to do this on the client machine and the Hyper-V Server):
|
1 2 3 |
Set-NetFirewallRule –Name "RVM-VDS-In-TCP" –Enabled True -Profile Any Set-NetFirewallRule –Name "RVM-VDSLDR-In-TCP" –Enabled True -Profile Any Set-NetFirewallRule –Name "RVM-RPCSS-In-TCP" –Enabled True -Profile Any |
*** (Update 2018-05-10) ***
CAUTION – May 2018 Windows 10 updates can cause problems
Watch out folks… Some of the Windows 10 updates between March 2018 and May 2018 add some new credential stuff to Windows 10, and if the Hyper-V Server 2016 is not also patched up the the same (or corresponding) level, you will get authentication errors trying to connect to Hyper-V Server 2016 from Hyper-V Manager on Windows, and it will even prevent RDP access from Windows 10 to Hyper-V Server 2016.
The issue is referred to as “Windows 10 RDP CredSSP Encryption Oracle Remediation Error Fix”
The error message will look something like: “An authentication error occurred – This could be due to CredSSP encryption oracle remediation”
So, you can fix this by updating/patching Hyper-V Server 2016 to the latest/correct versions, *or*, you can basically disable (or at least reduce) this new security/credential stuff in your patched Win 10 machine by following the instructions on this blog post:
(click image to follow link…)
Windows 10 RDP CredSSP Encryption Oracle Remediation Error Fix
There is also more info here which dives in deeper as to what the issue is, and when it ocurrs:
Good luck to you!